Friday, October 16, 2009

DIY Chrome Vios Aircon Control Panel

First remove the aircon panel, to do this, you will have to remove the bottom and sidepanels, then and stereo/aircon vent panel, then unclip the aircon control panel. Once you have it open, pop out the aircon controls they are only held by clips. Use a screwdriver to pop them out.


Make sure you have your materials ready; Chrome Vinyl Film, a Hair Drier, better if you have a heat gun, a pair of scissors and a cutter


Cut the film, to size, make sure that there is some room on the side.


Remove the backing paper and apply the film on top of the panel, crease out the bubbles. You might need to heat the film from time to time so you can stretch it over the curved areas.


Here come's the tricky part... you also need a lot of patience for this since it may take you while. Heat the recessed areas of the panel, stretch it by pushing the film, into the recessed holes. Do this several times until you have enough stretched film to cover the curved areas. Just keep doing this until you can press the film on to the curves, the film will conform to the shape of the panel... be patient, you'll get there eventually, it took me a little bit over an hour to do since I was only using a hair dryer, a heat gun would make it much easier.


Cut a small cross patern on the recessed area, then pull the film down so you can stretch it on the edges of the openings. Heat it a little bit so it would again conform to the shape of the opening. Then cut out the excess with a cutter. Now you will have a fully covered aircon panel.


Re install the panel, pop in the Aircon dials. Screw back the radio panel, and attach the side and bottom panels, and there you have it!


Wednesday, October 14, 2009

DIY Heat Wrapping Vios Tail Lamp with Tinted/Smoke Vinyl Film

It's essential to have a real heat gun, a squeegee a helping hand. The Heatgun can instantly soften the film, and actually make it as stretchy as cling wrap. That being said, it was easier to apply. Use the squeegee to edge out the bubbles.

First you have to tac the film on to the assembly, it doesnt really matter where you start. Select a spot you want to cover, have a friend help hold out the film and pull. Gently heat the film and as soon as you feel the film starting to stretch immediately cover as much area as you can. We learned its best to stretch going outward. Do this until you fully cover the tail lamp.

If you have any questions, feel free to drop a comment.


Wheel And Tire Guide For Stock And Lowered Suspensions

This is for the second gen Vios. This should help you in choosing rims.

WHEEL BOLT PATTERN PCD = 4 x 100mm

CENTRE BORE = 54.1mm

OEM wheel sizes, offsets (ET), and tyre sizes (diameter in inches):

14x5, ET45, 175/65/14 = 23.0
15x5.5, ET45, 185/60/15 = 23.7
16x6, ET51, 195/50/16 = 23.7
17x6.5, ET51, 205/45/17 = 24.3
TRD Option 18x7.5, ET42, 215/35/18 = 23.9

With stock suspension, you may safely fit many tyres from 23.0 to 24.3, +/-3%.

__________________________________________________ _______

Recommended offsets (ET) and tyre widths (mm):

ET35+ = 175-185
ET38-ET40 = 175-195
ET42-ET45 = 195-205
ET45+ = up to 215

__________________________________________________ _______

Here is an excellent and easy to use wheel and tyre fitment guide:

http://www.rims-n-tires.com/rt_specs.jsp

__________________________________________________ _______

Optional tyre sizes (diameter in inches):

*Commonly recommended replacement sizes

Fitment depends on wheel width, offset, and suspension mods.

175/65/14 = 23.0*
185/65/14 = 23.5*
195/65/14 = 24.0
195/60/14 = 23.2*
205/60/14 = 23.7*
215/60/14 = 24.2

185/60/15 = 23.7*
195/60/15 = 24.2*
195/55/15 = 23.4*
205/55/15 = 23.9*
195/50/15 = 22.7
205/50/15 = 23.1* (Most lowered applications)
215/50/15 = 23.5
225/50/15 = 23.9

195/50/16 = 23.7*
205/50/16 = 24.1*
215/50/16 = 24.5
195/55/16 = 24.4
205/45/16 = 23.2* (Most lowered applications)
225/45/16 = 23.9

205/45/17 = 24.3*
205/40/17 = 23.5* (Most lowered applications)
215/40/17 = 23.8

215/35/18 = 23.9*
225/35/18 = 24.2
205/40/18 = 24.4

__________________________________________________ ______

Staggered fitments:

1. Staggered offsets are common in Japan. These applications even out fitment front to rear and are purely for appearance. Tyre size generally remains constant front to rear. Staggered offsets preclude tyre rotation. Recommended maximum stagger is 10mm.

Example: FR, ET45//RR, ET38

Example: FR, ET42//RR, ET35

2. Staggered tyre widths are less common, especially on front wheel drive cars. These applications even out front to rear fitment. They are not recommended for the track, but as an appearance option they are safe under normal driving conditions. Staggered tyre widths preclude tyre rotation.

Example: FR 205/55/15//RR 225/50/15

Example: FR 205/50/16//RR 215/50/16

Example: FR 205/40/17//RR 215/40/17

3. Wheels spacers are another option to even out fitment front to rear. Maximum recommended rear spacer width is 10mm. Tyre rotation is still possible.

Example: FR, ET42//RR, ET42 with 5-10mm spacer

Tuesday, October 13, 2009

Vios JDM Yellow Headlights! Using Yellow Vinyl Film

Here are some examples of other cars with Yellow headlight film


This mod actually also protects you headlights from scratches and dings from small pebbles and dirt.

1. Remove the bumper
2. Lay the film on the headlight
3. Stretch the film and apply on to the headlight, use a heat gun to heat the film to make it stretch.
4. Push the air bubbles using a squeegee (wrap the squeegee with cloth to avoid scratching the film)
5. Do this repeatedly until you fully cover the headlight
6. Stretch the film over the edges of the headlight and pull downward to fully cover the exposed edges
7. Trim film around the headlight
8. Re attach the bumper

Some photos for reference


End Result

Monday, October 12, 2009

Chrome Stereo Panel Mod

Chromed my Stereo Panel, with Vinyl Film.


Step1 Done
Step2 Re- do my Aircon Control Panel as well... post pix again when Im done.

Sunday, October 11, 2009

DIY Vios Chrome Window Trim

DIY Chrome window trim

Notice how higher variants of vehicles have the chrome window trim? Unfortunately even the highest variant of the Vios does not have chrome window trim. This is a very affordable way to achieve the same look. Purchase some chrome vynil strip (you can find rolls of these in car accessories shops.. in the philippines its available at Concorde stores for about P350.) The width of the strip should be about a centimeter in thick so you can get a OEM look, thicker widths is also harder to apply.

Step1: Make sure you clean the window trim first with a clean cloth and some water. Any form of dust that gets in will easily be seen.


Step2: Cut the edge of the chrome strip, so that it matches the angle of the trim and apply. Also, give it some space about 2-3mm from the base of the trim.


Step3: Pull the strip and line it up, make sure you've got it straight. Use a piece of cloth so you can slide it on easily and apply just enough pressure to stick the chrome strip.


Step4: As soon as you reach the end of the trim, use your fingernail to crease the edge, and then cut along that edge to get a clean look.


Step5: Peel off the protective plastic and your done! Repeat for all other doors.


Here are some photos of the finished look.


Saturday, October 10, 2009

Need-to-know stuff about our tires

Our tires are the most important component of our vehicle, often times we neglect the things that we, car owners should know about them. You go out and buy a new set of wheels, ofcourse you'll get some new set of tires escpecially when your switching your stock 14's or 15's to a 17" wheels. Then the shop gives you options as to which tire to pick, most of us will just ask the price difference and which they think is best, but what we don't know is when these were manufactures, if these are good for our climate, what tire pressure is appropriate for these set, how much load can this tire take on, does it have a good traction, can you go 200kph with these tires and the need-to-know list goes on. Trust me, that's how I was when I got my 17's and Maxxis Victra MZ-1 tires, well not unless I'm the only noob about this matter here. If yes well, I just want to share this anyway.

Here's an illustration on what those figures on the side wall of your tires are.


Here's how you'll know when your tires were manufactured.


In this case, tires were manufactured on the 7th week of the year 2007 which falls on the month of February 2007. Most tires usually expires after 4 years, so in this case, these tires will expire on the year 2011.

Load Index is important for you to know how much load your tire can take.


The letter that you see beside the number is the speed symbol, here's a chart for your speed symbol for you to know as to what speed can you go with your tires.


Here is an illustration on how to read your tire specification.


Here you'll be able to know if your tire is fit for the climate you live in. If you're from the Philippines yours should indicate Temperature A.


With regards to traction, it is grade from highest to lowest as AA, A, B and C respectively. Mine says Traction A.

On Treadwear, the higher the figure, the longer your tire will last. Just to site and example, a figure that says Treadwear 400 will last twice as long as a Treadwear 200 tire.

I think that's just about it. I hope you were able to pick up something from this entry, so when it's time for you to get yourself some new set of tires, you'll have something to check other than it's price.

Thanks for reading.

Friday, October 9, 2009

18" Concept One Sato5 for a more contemporary but sporty style

 The Vios has a naturally sporty look, but is also a pretty compact car. The largest rim that would fit is 18" so I went for that. ;

Concept One Sato5, has a really fat Chrome lip (3"), has a two piece look because of the riveted design, and best of all has an offset of +40 which brings out the lip from the fender a bit. 18x7.5 +40 ET 100/114 PCD 8 hole Universal. The finish I got on these were hyperblack, with a chrome lip. The only thing missing now is the proper drop, I think I got the fitment already, stance would have to follow

The Concept One Sato 5 although different, looks similar to the MRR GT-5 with the exception of the spokes being more angular on the hub and a bit further out on the Sato5.

Here's a pic of the Concept One Sato5


Here's a pic of the MRR GT5


Check out the lip slightly peeping out of the fenders! its got the look im after.


Check out the 3" lip

It's got the overall Style for the rims that I was looking for and all thats missing now is to drop it some more, and get a more elegant looking bodykit.

*What's important is that you are satisfied with your cars look and it makes you happy. Cheers!

Thursday, October 8, 2009

Sedan Spoiler Install DIY

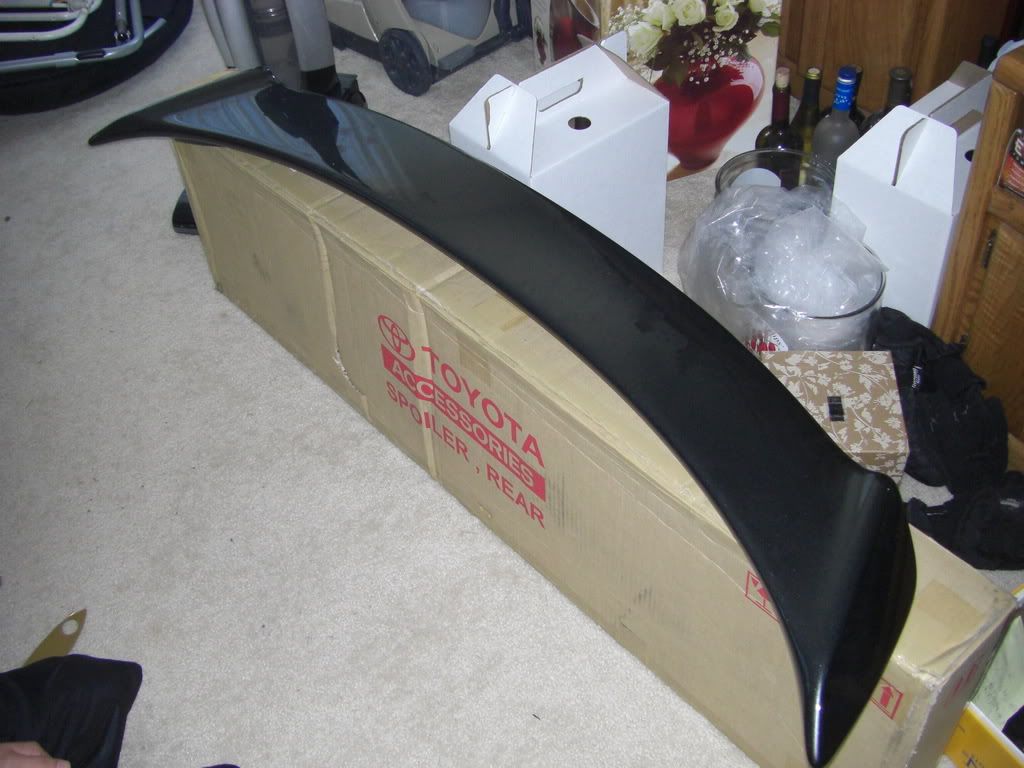
This is with the Thai OEM Toyota Vios spoiler, so your install may vary.

Tools needed: most likely will vary, but I used a flat head and Phillips screw drivers, a drill, 3 and 5 mm drill bits, and some elbow grease
Time needed: shouldn't be this long if you have a step-bit, we took 4 hours, including several breaks and waiting for the drill to charge back up, some chatting, picture taking, and cleaning up.
amount of gallons of water needed for thirst: at least two gallons for each of us


Okay, I finally got around to installing my Vios spoiler. I was also pressured in time since I was a couple hours late in helping my friends move (towards the end of the install), so my friend and I may have forgotten to take a pic or two. Well here it goes...


Step one:

Get the spoiler painted (I recommend getting it professionally painted, well worth it).


Step two:

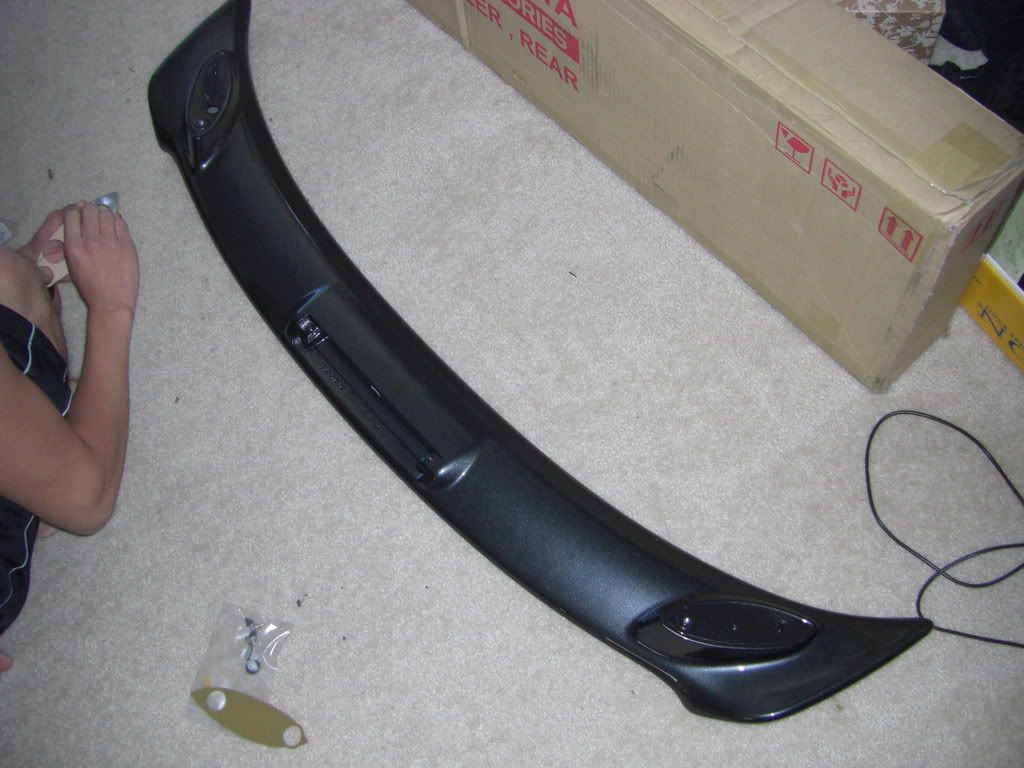
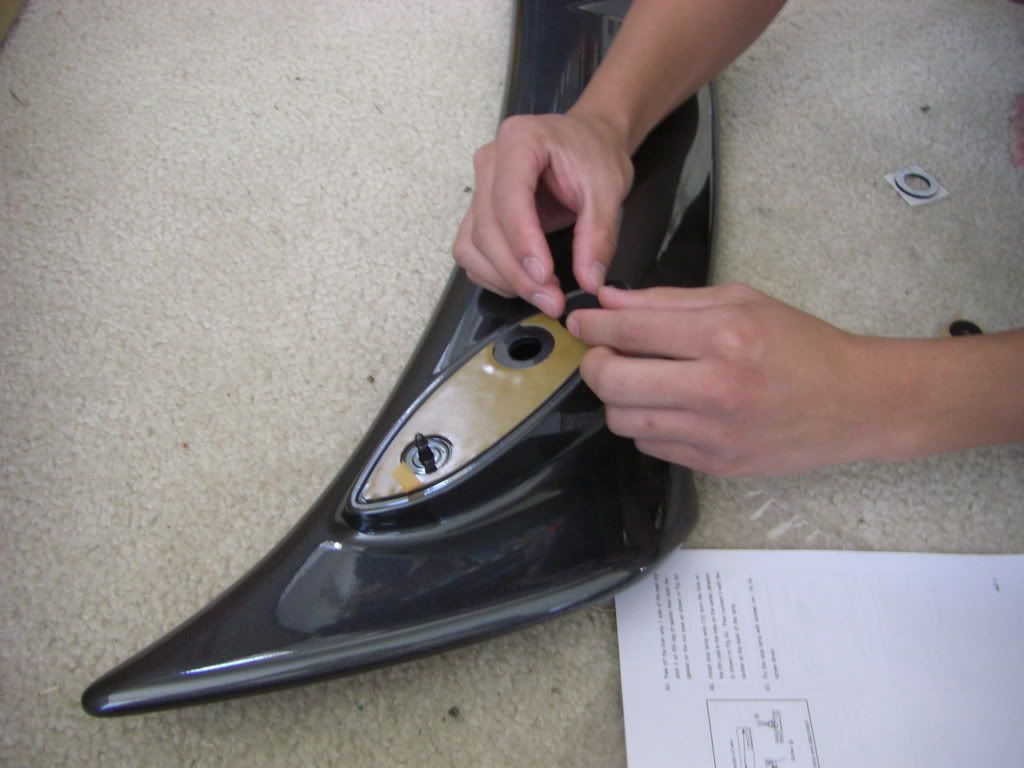
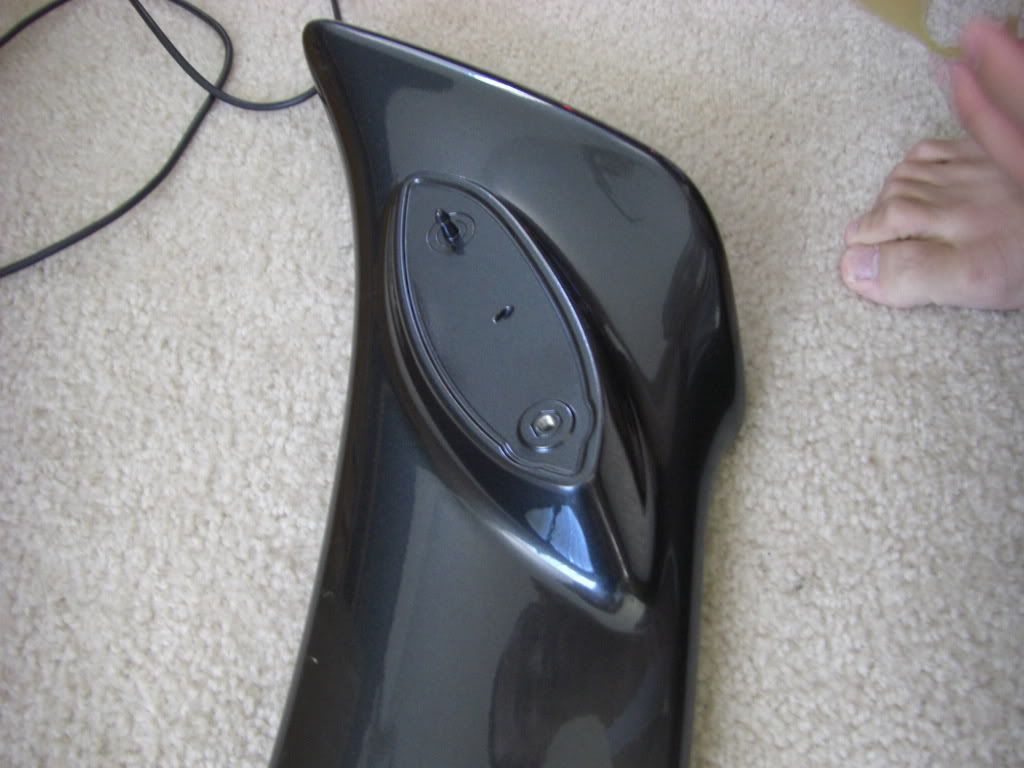
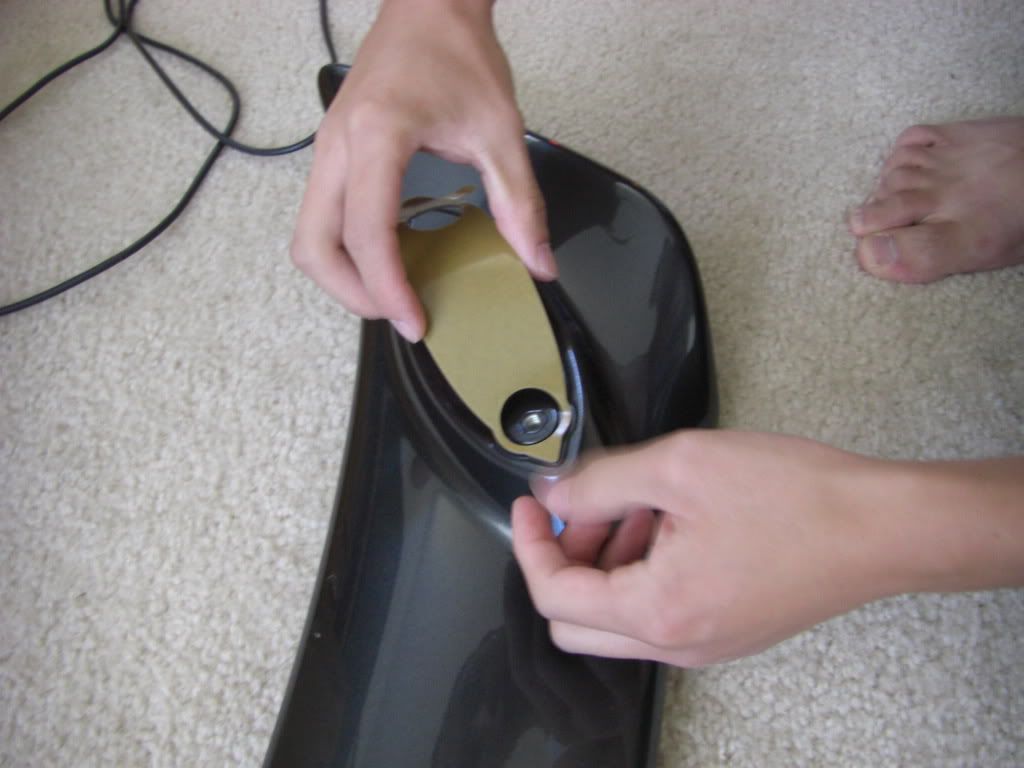
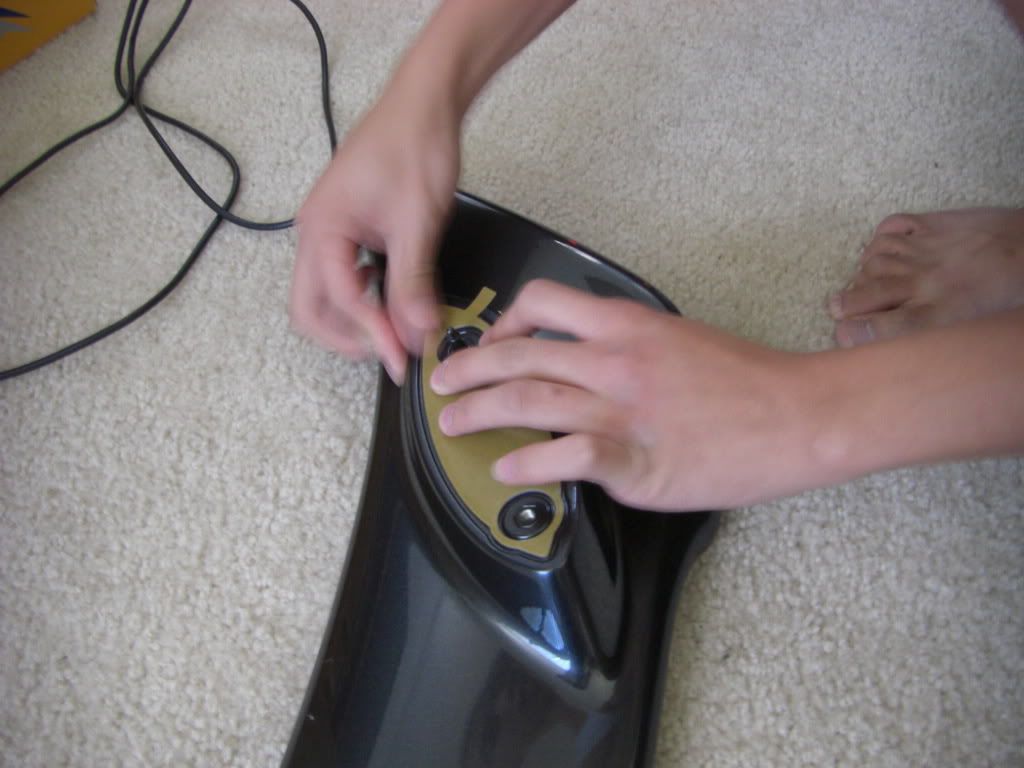
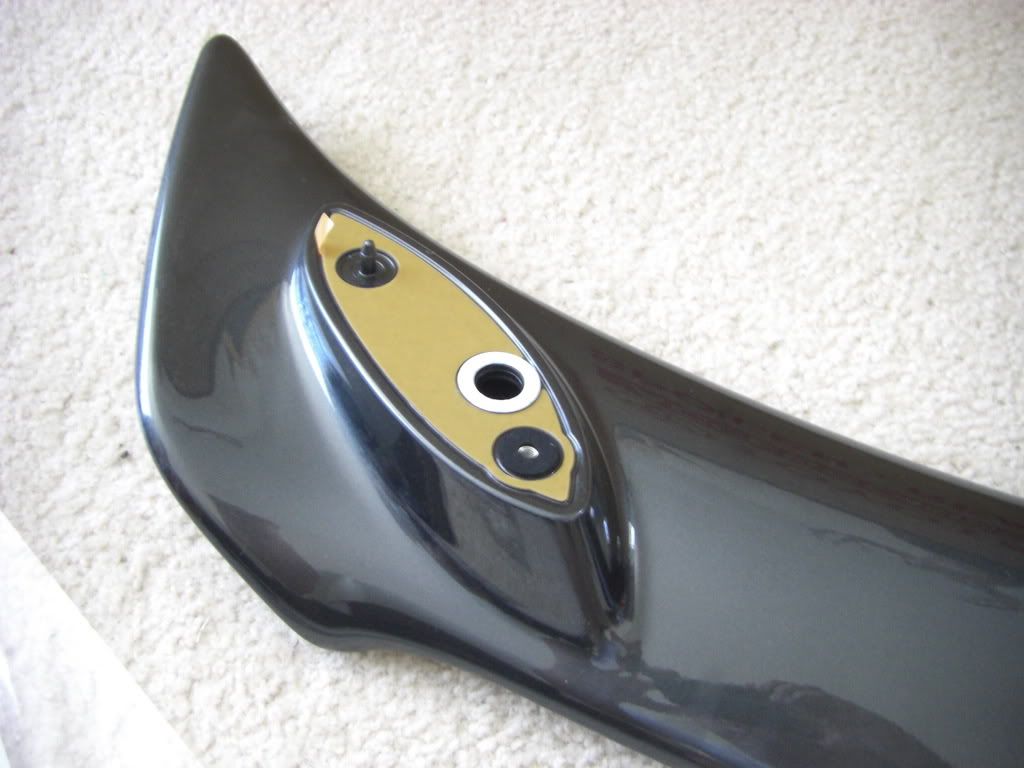
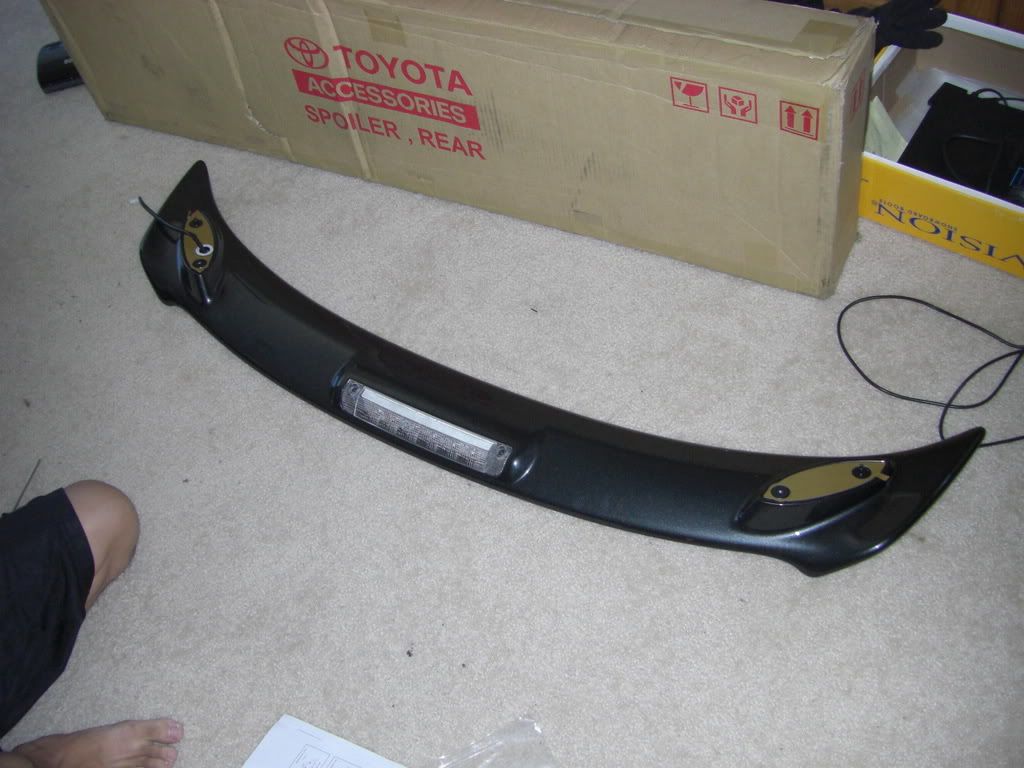
Peal the top side (spoiler side) film strip off of the protector pad (right pad). Peal off the spoiler side only and leave the film strip on the "trunk side". Place the protector (right) on the right legs. For this spoiler, the right leg protector has three holes while the left leg has two. Firmly and evenly press down to "stick" it on.


Step three:

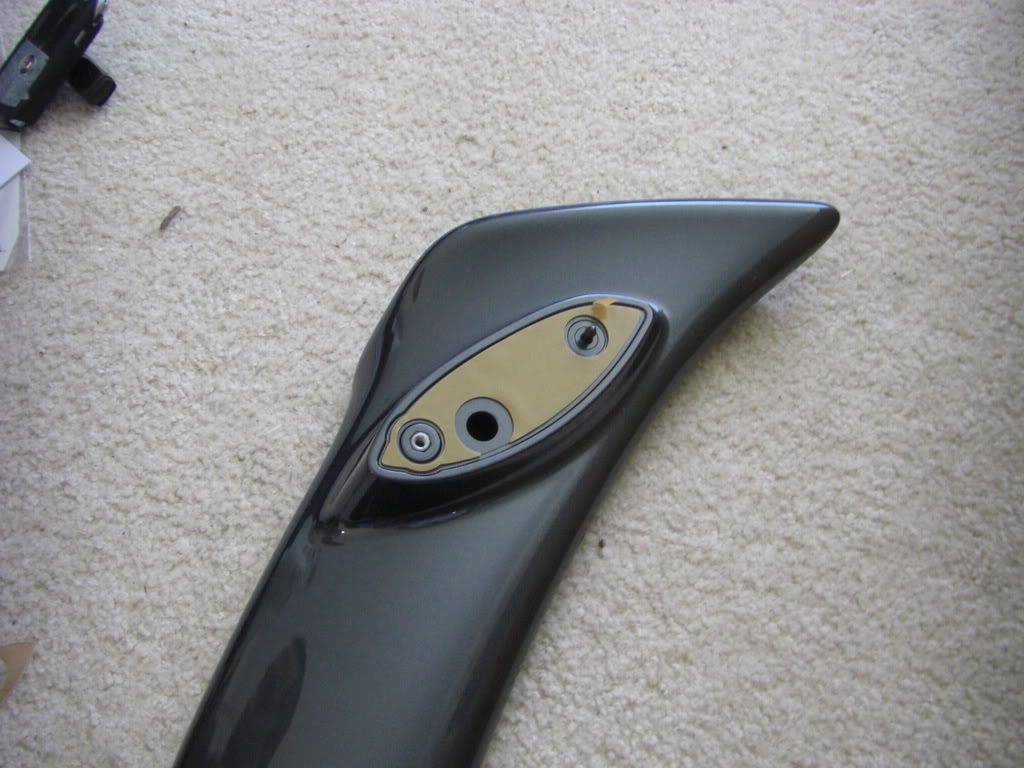
Peal off one film strip on the seal. Place the seal on the right leg. The seal goes to where the nut is (left hole two pictures above).
Again, firmly and evenly press down on it.
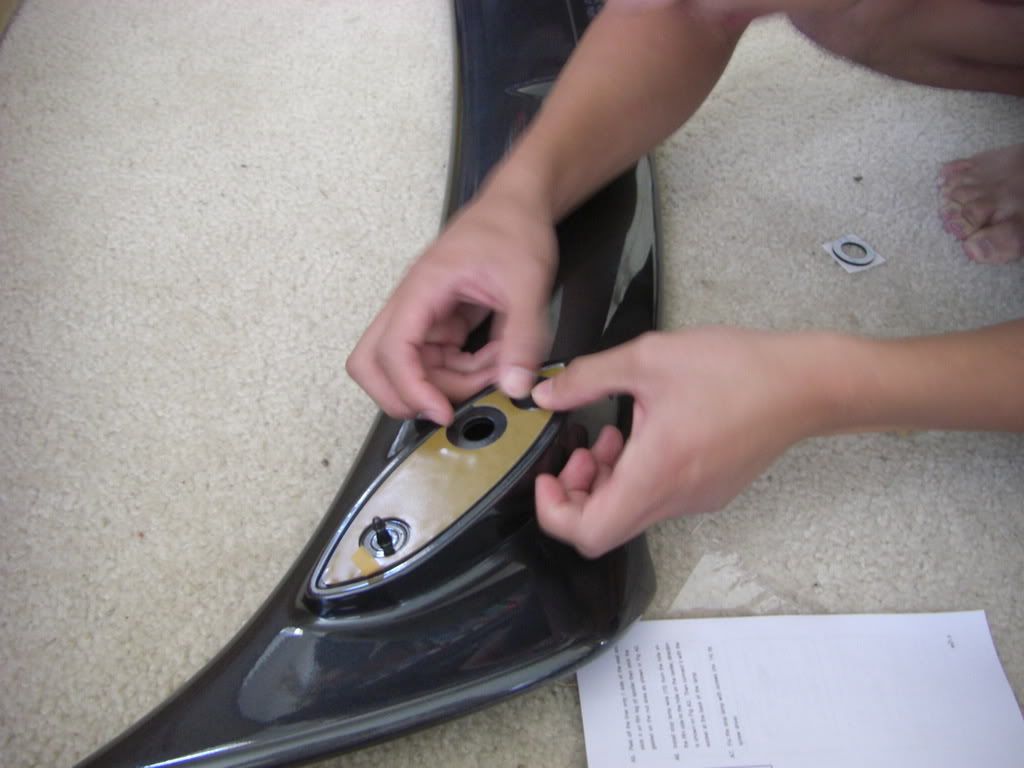


Step four:

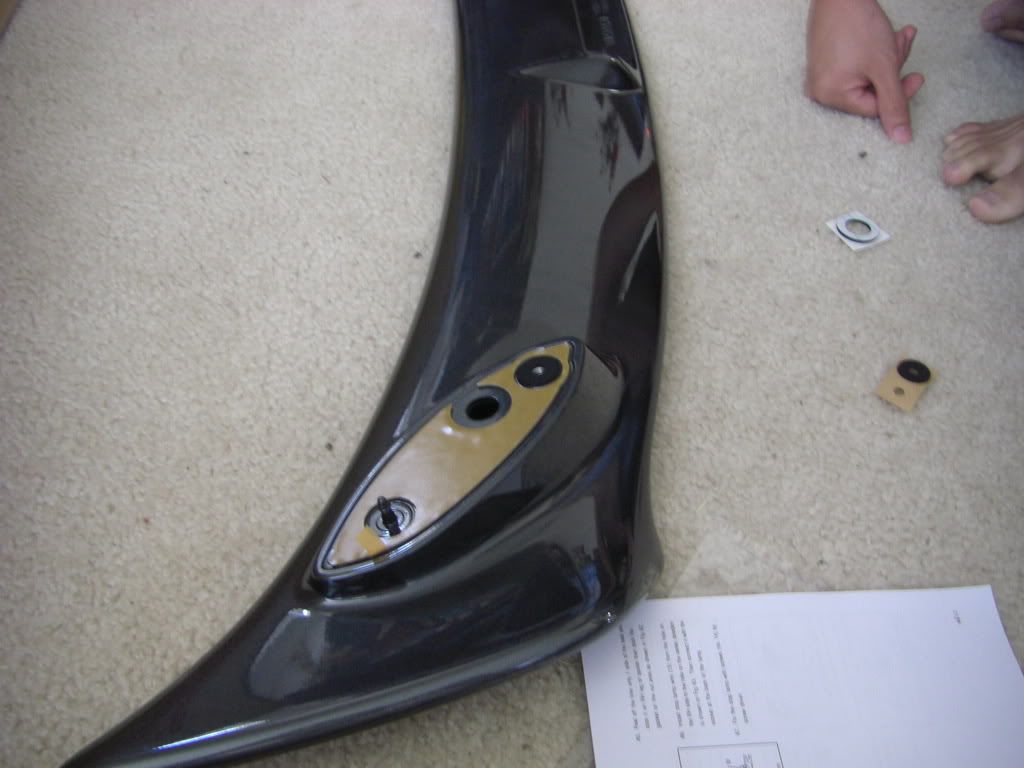
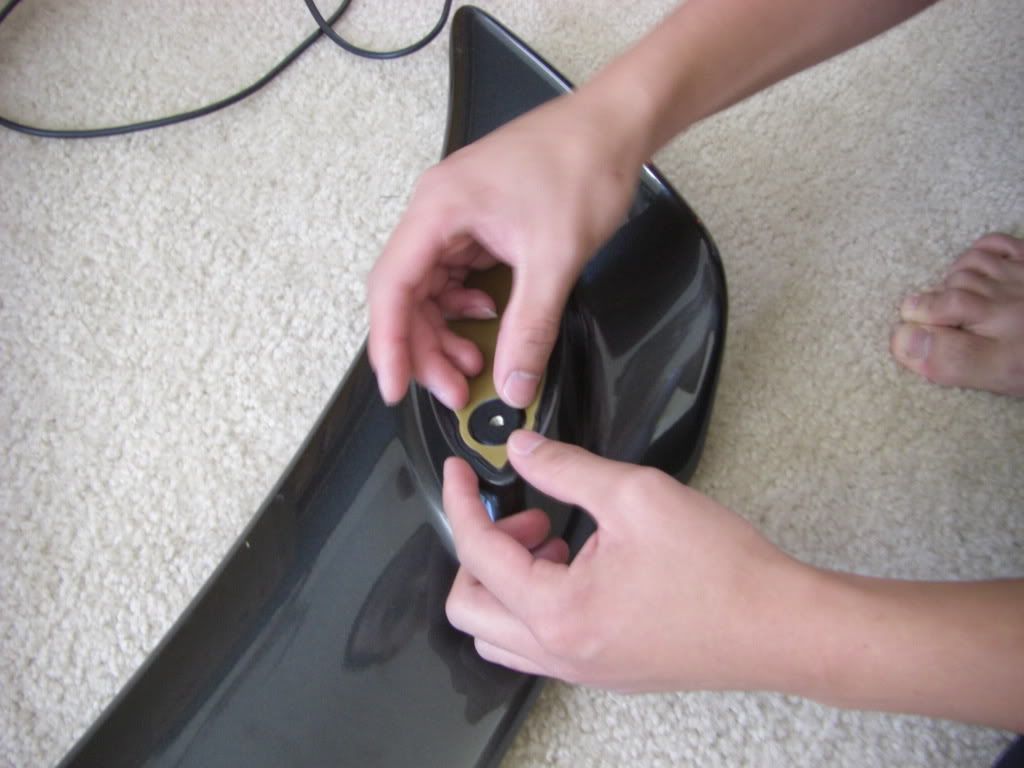
This only applies to the right leg. Peal off the film strip on one side of the gasket. Place the gasket on to the "odd" hole. This hole is for the wiring for the third brake light. Firmly and evenly press down on it.


Step five:

Repeat steps two and three for the left leg.
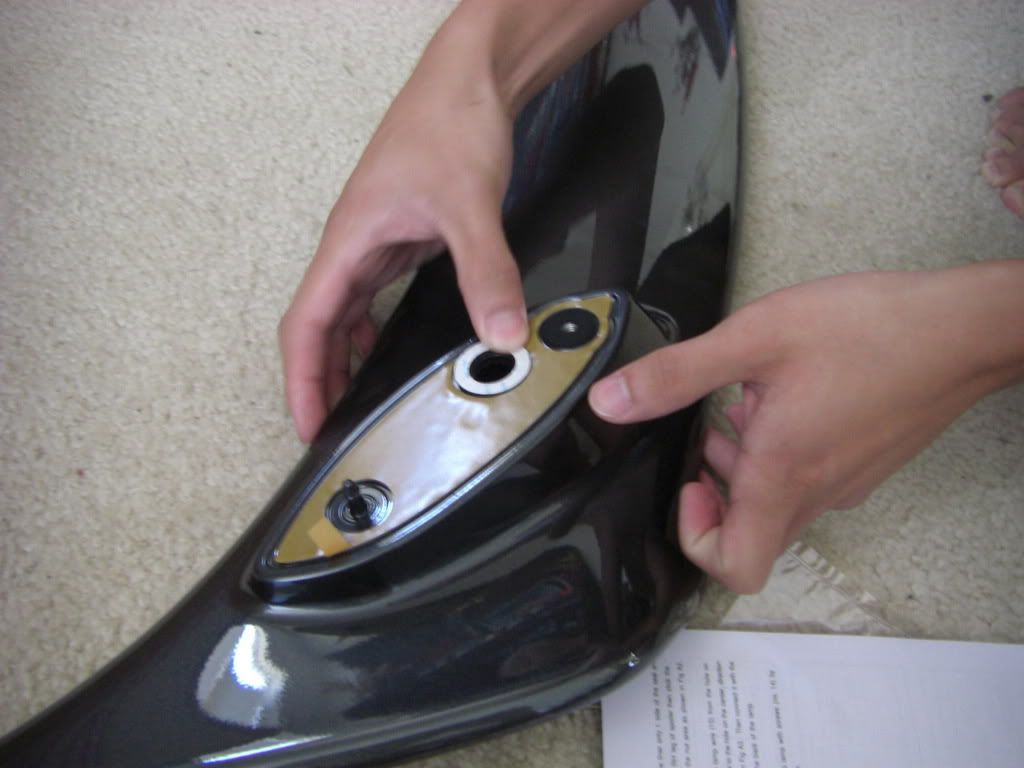


Step six:

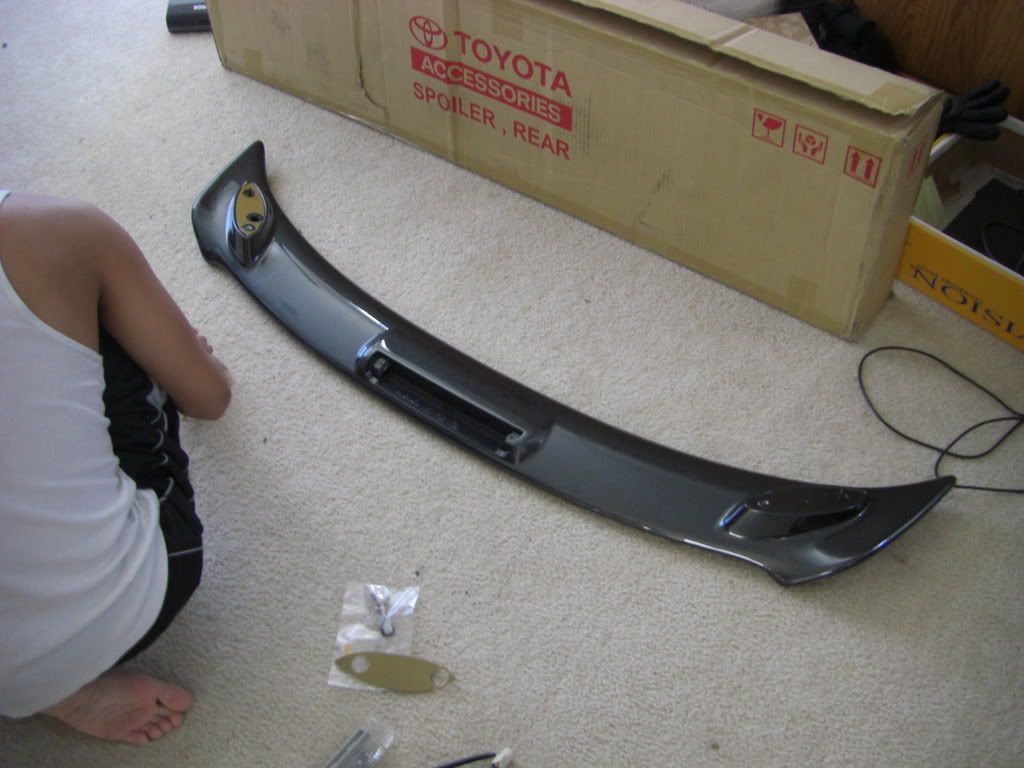
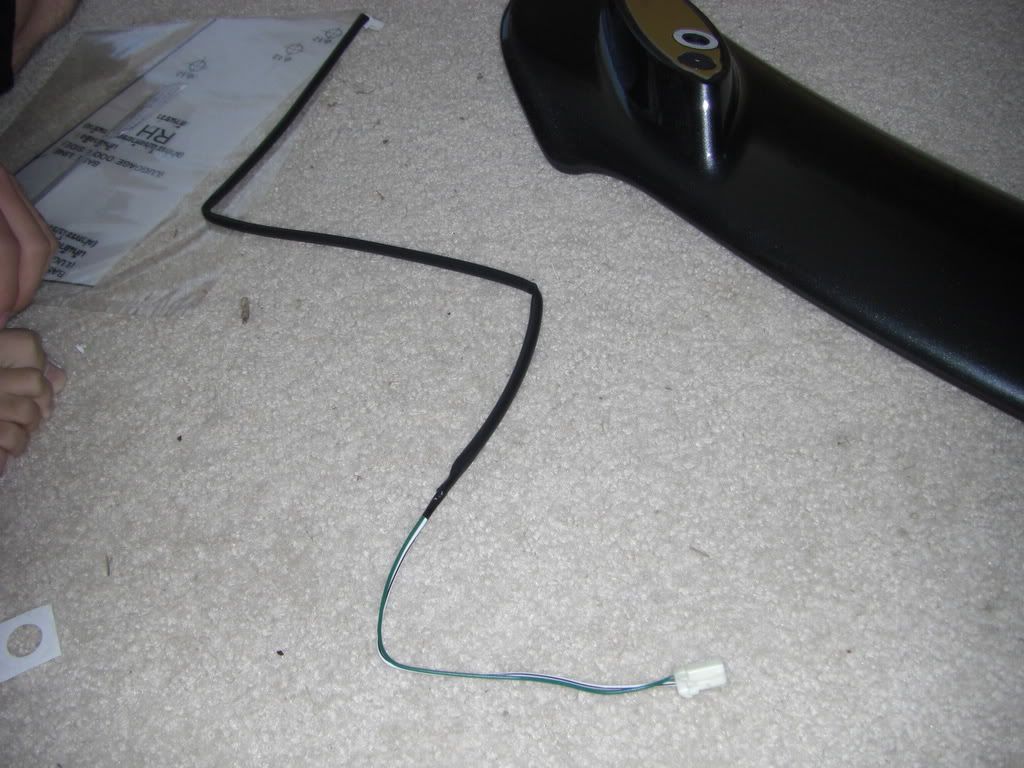
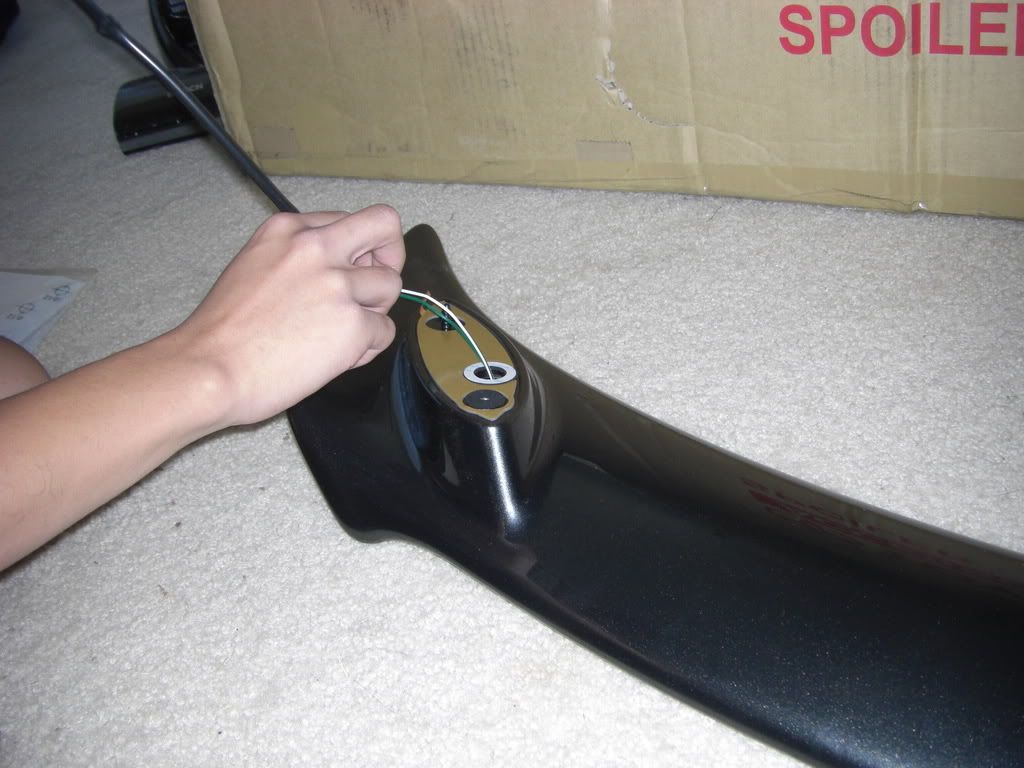
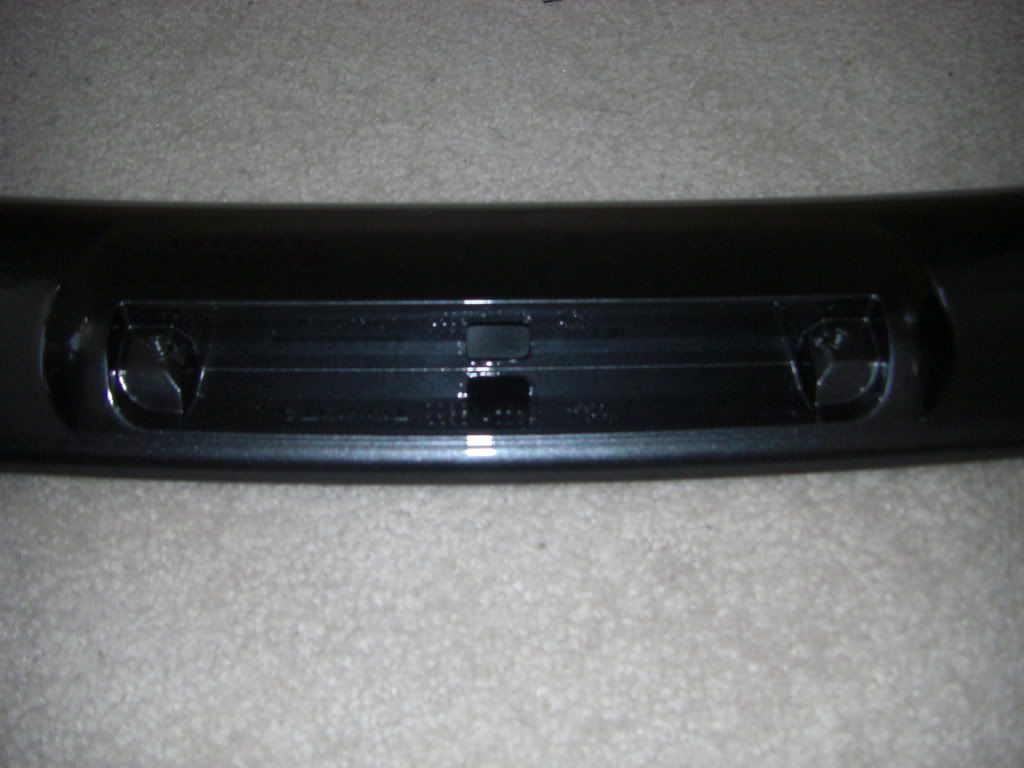
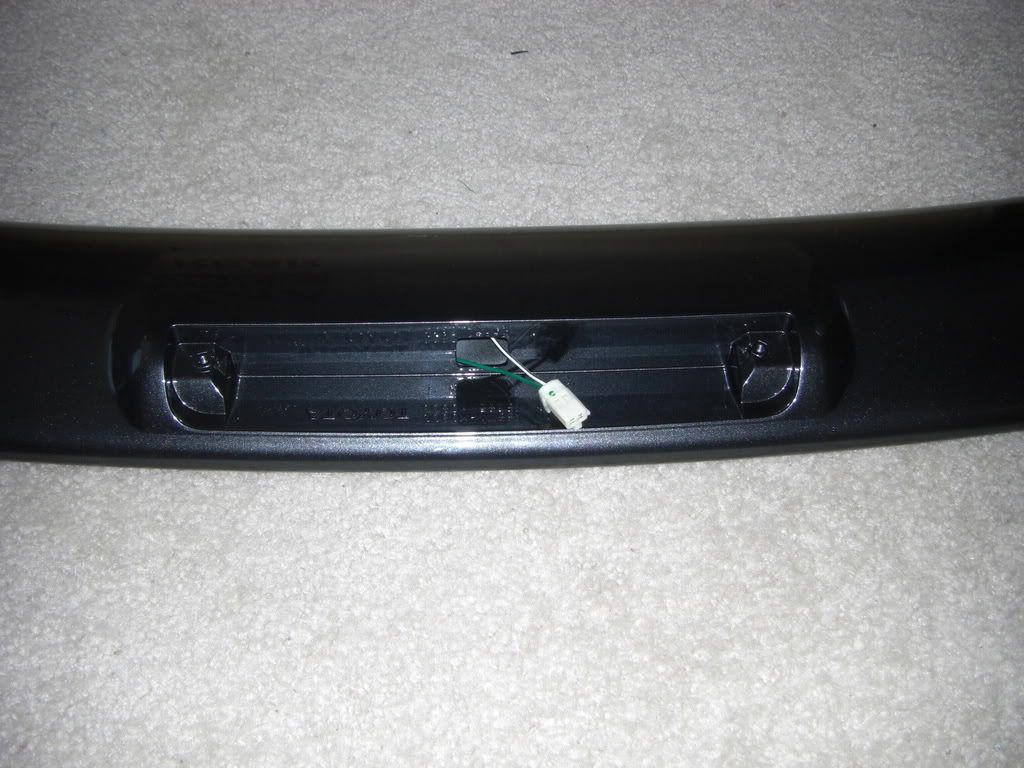
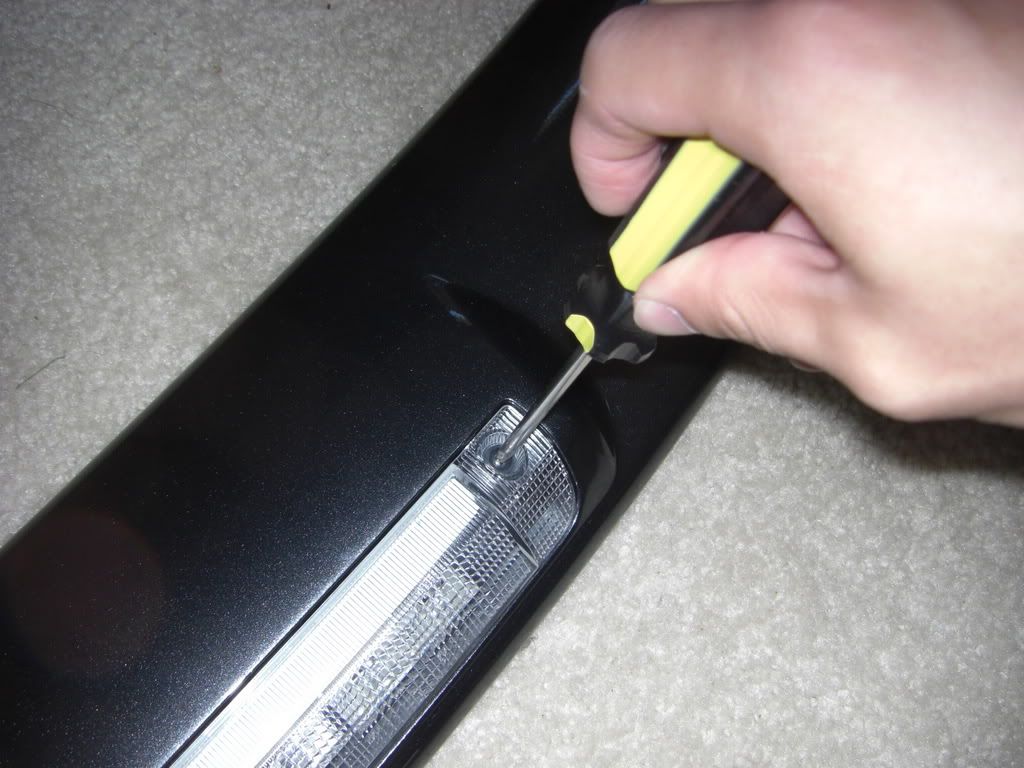
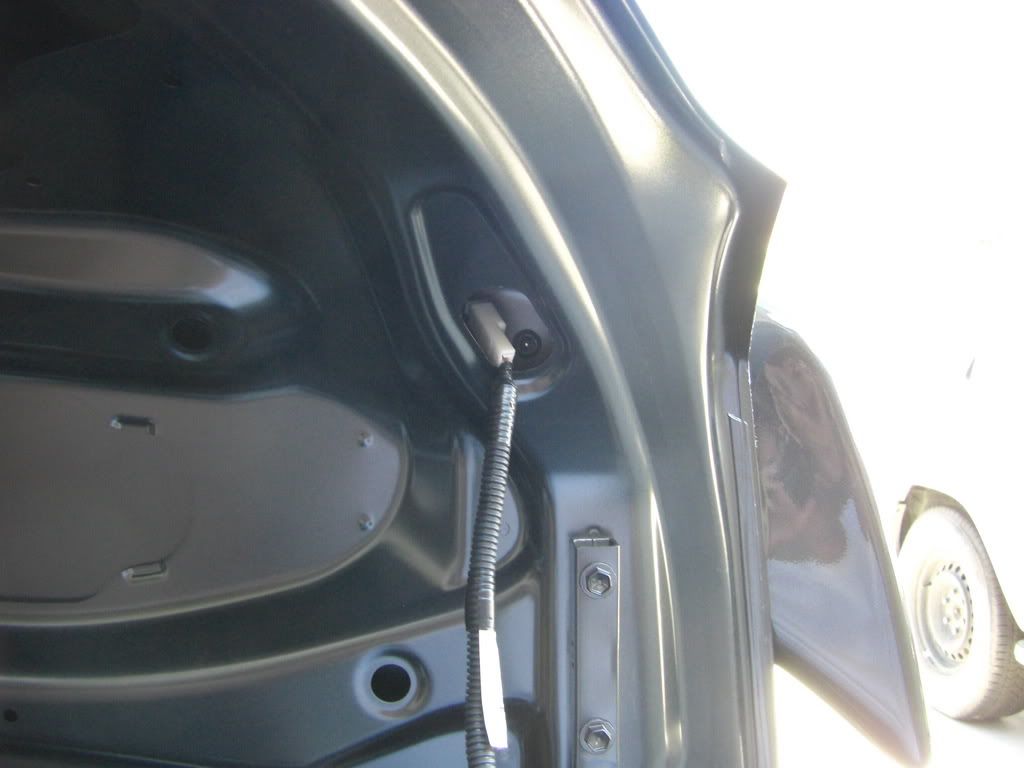
Now moving onto the third brake light. You have to get the shorter wire from this hole (hole in the middle)


to this hole


I started from the leg hole and threaded it to the light assembly hole. It's basically "fishing" until you can grab the connector and pull it out of the hole. lol...oh yeah, I test fitted the connector onto the LED assembly to make sure which side of the wire should go through first.
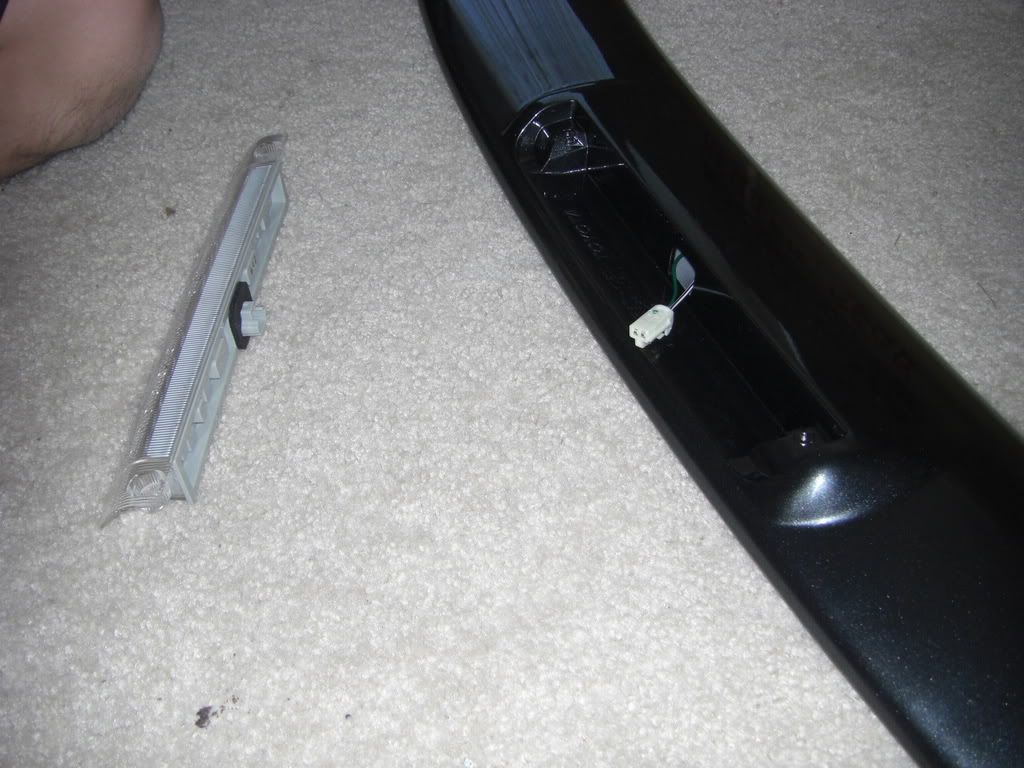
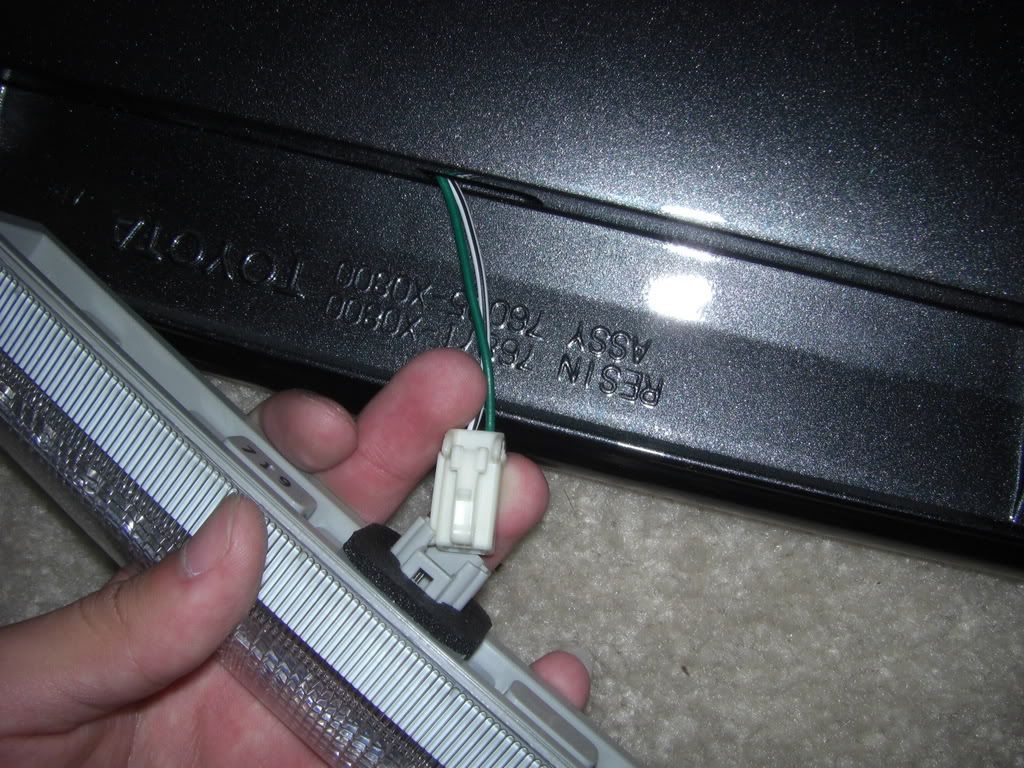


Step seven:

It's time now to connect the wire to the LED assembly. Simple plug-and-play here.
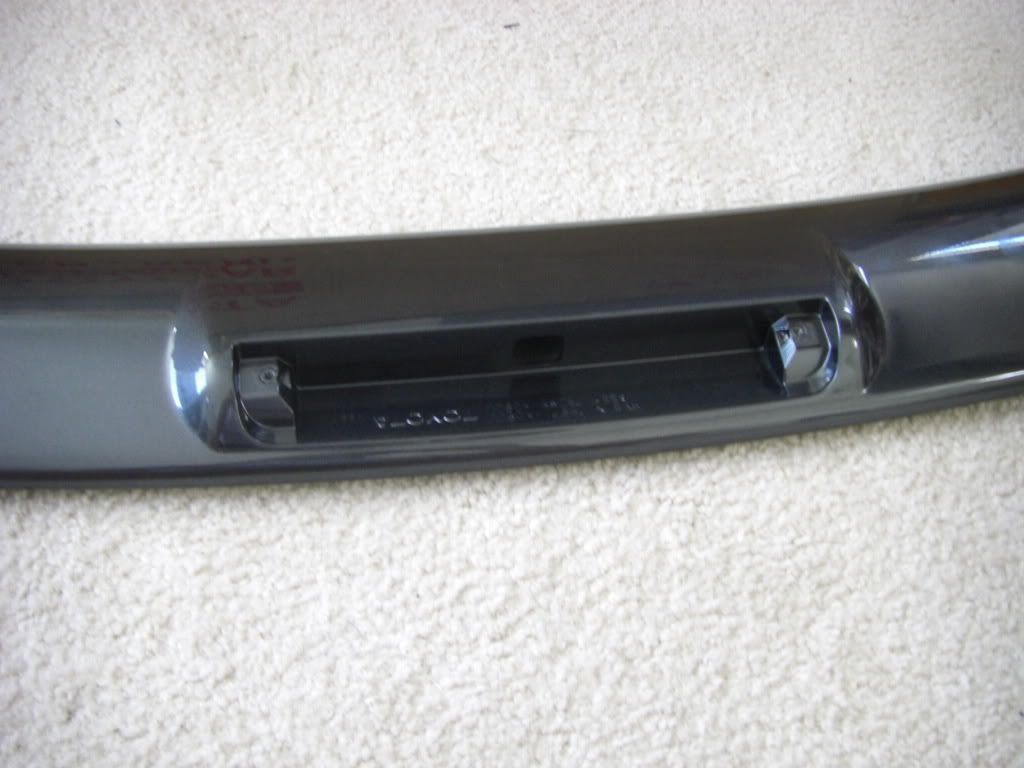


Step eight:

Once you have connected the wire to the LED assembly, push the "excess part" of the wire back into the spoiler and screw down the LED assembly. There are two screws for my spoiler, yours may vary.


Step nine:

You can leave the spoiler in a nice cool place for now. And if possible, do the remaining steps in a shaded area. My friend and I were out in the sunlight, working in what must have been 100+ degree Fahrenheit weather.

Rinse off clean the trunk of your Yaris/car. Then dry with a lint/scratch-free cloth/drier. Since it was 100+ degrees, it dried by itself within 30 seconds. I dried the remaining drops with the cloth.


Step ten:

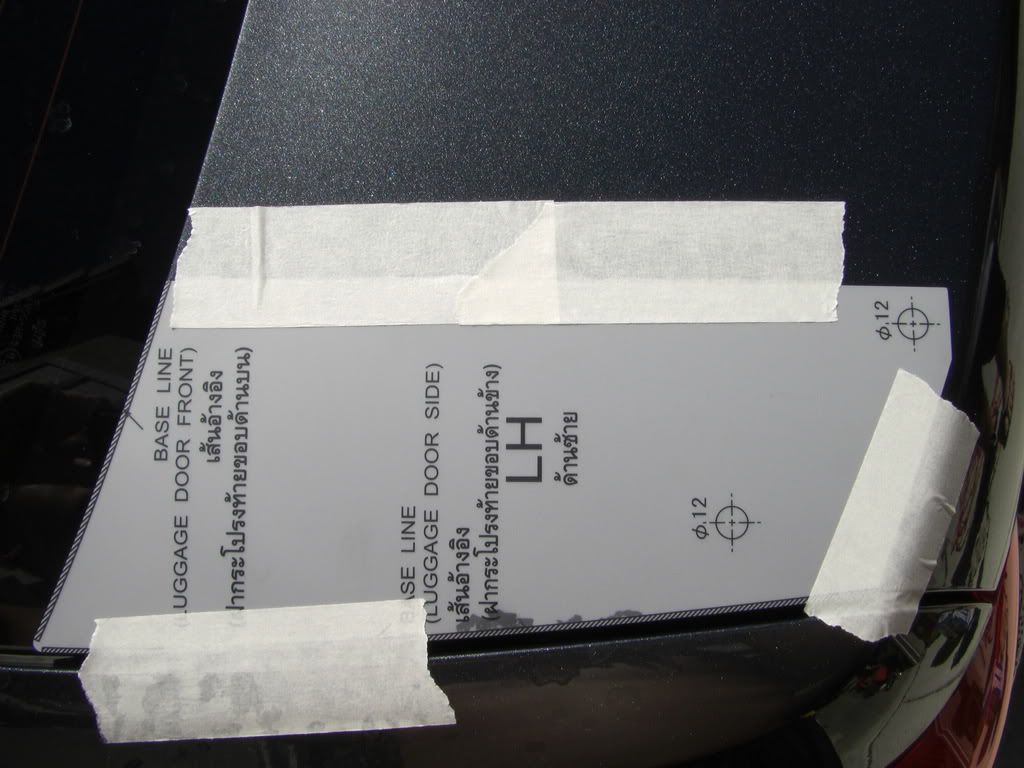
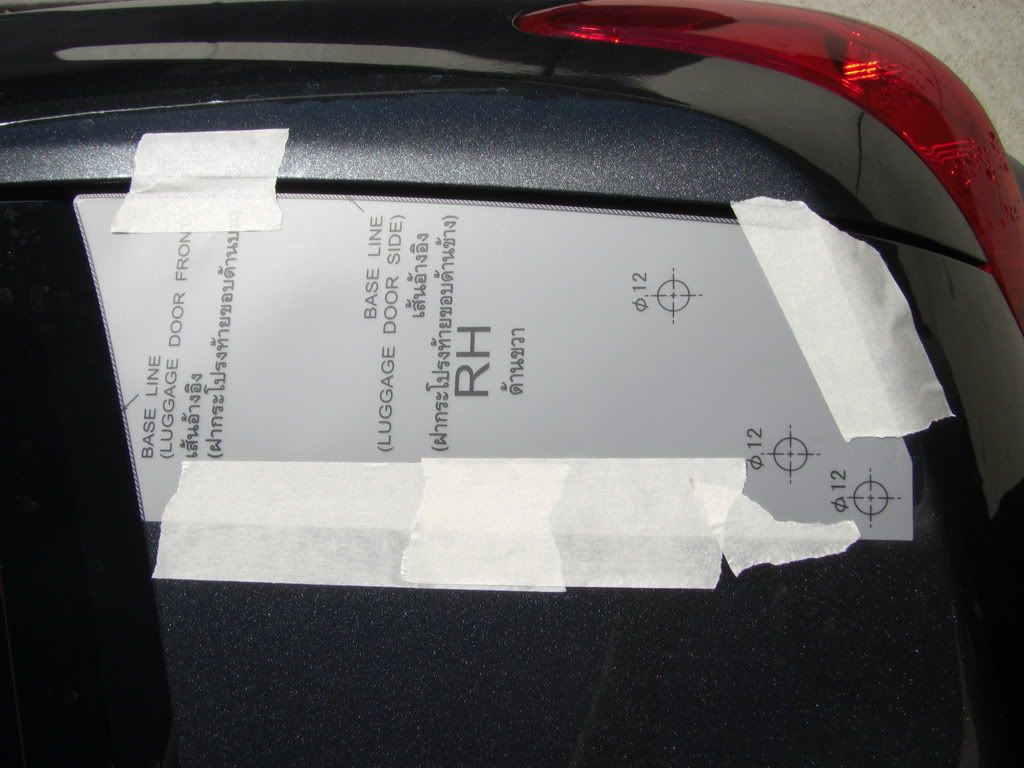
Now it gets to the harder parts. Take your time here. If you were given templates, it'll be much easier. Take the templates provided and place them where they're supposed to be. Mine requires the templates to be at the tip of the front and sides of the trunk. Tape a very small section to prevent it from moving. With a measuring tape, measure the specified distance with the most rear cross-hair (with mine at least). Sorry, no pics of the tape measure part since both me and my friend were doing it (no one to take the pic). Once everything is in proper distances, tape the templates down, making sure you do not move it out of place. If you do not get the correct distance, then move the templates and re-measure. Repeat until the correct distance is achieved.

*I recommend painters tape (you know, that blue one) instead of the tape we used (regular masking tape).


Step eleven:

Now that everything has been correctly measured and taped down, open your trunk. You will have to take off the lining/carpeting from the trunk. To do this, you must remove these (not sure what they are called, but i call them suicide screws since if you take them off wrong, they're gone). I didn't have to proper tool for this, so I improvised. I took a flat head screw driver and pried them off slowly by rotating the screw why prying it off. Once all of these are removed, you can take off the carpeting.


Step twelve:

Sorry, I do not have a pic for this step...but it's simple. See all the cross-hairs


on all of them (total of five for me, left and right sides), take a drill bit and place it over the middle of the crosses. Then hammer the bit once or twice to give you a nice guide-dent.


Step thirteen:

Once you have the guide-dents in, you will need guide-holes. Take a 3 mm drill bit, and drill into the trunk. Be careful to not drill the entire length of the bit or else you'll be drilling into the inner layer. As you can see, I stuck some tape on the bit so I know where to stop. VERY CRUCIAL: mask off the area with at least two layers of tape before you start drilling, or else you might get a scratch like mine!


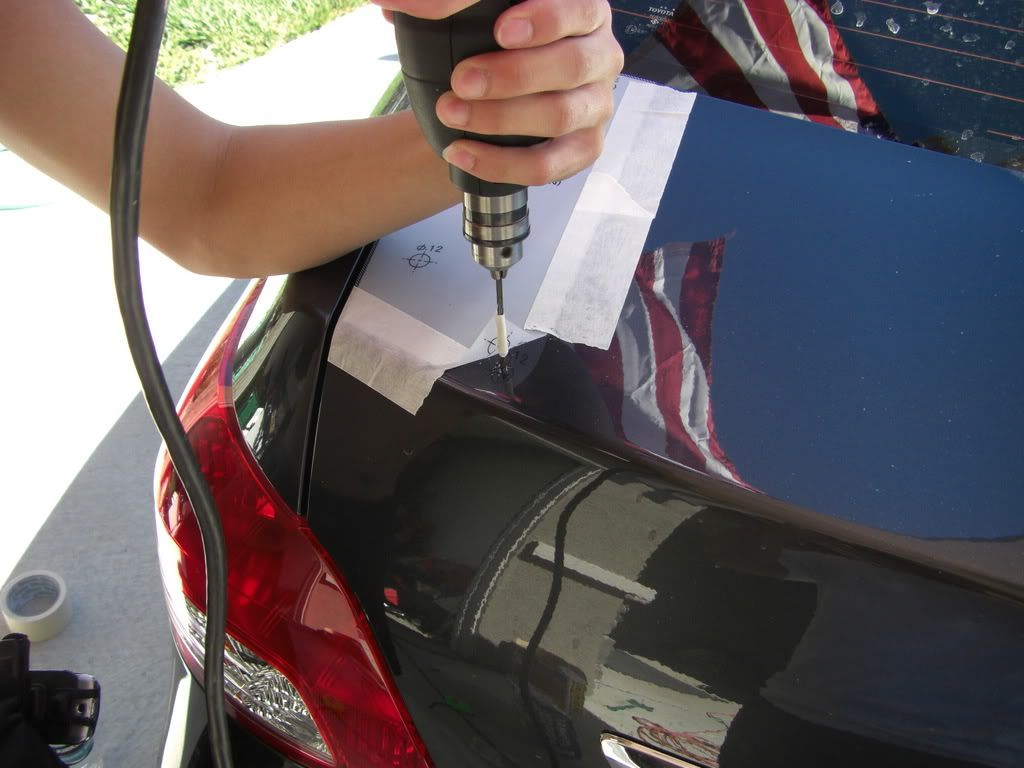
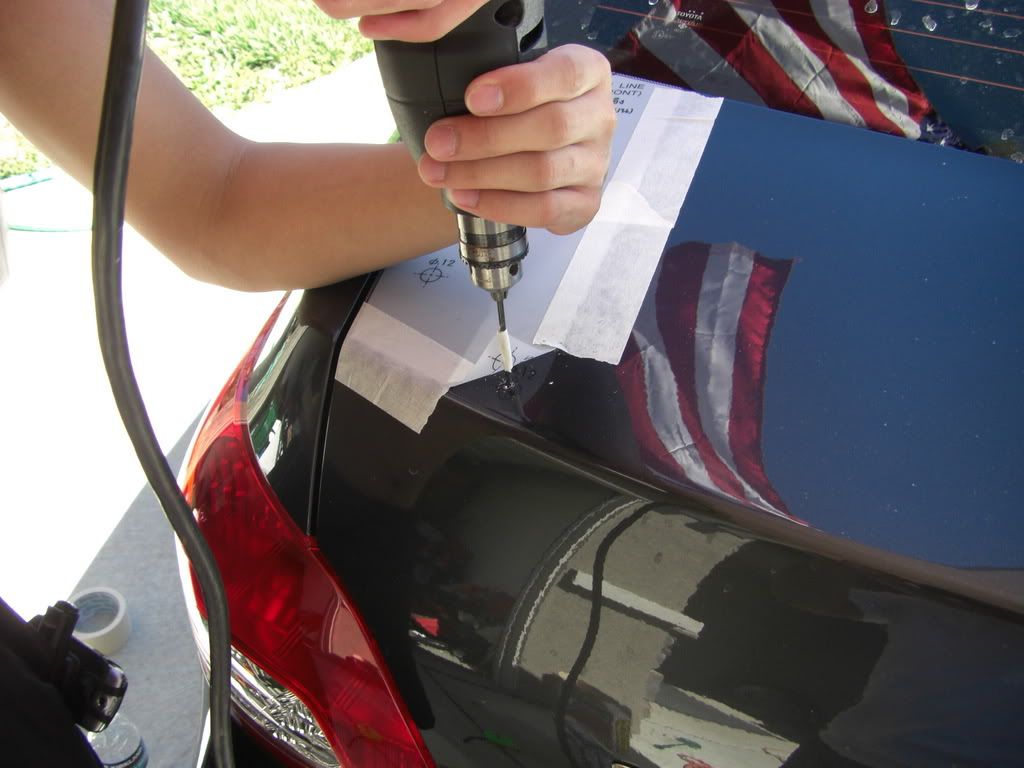
Do this for all the holes necessary.


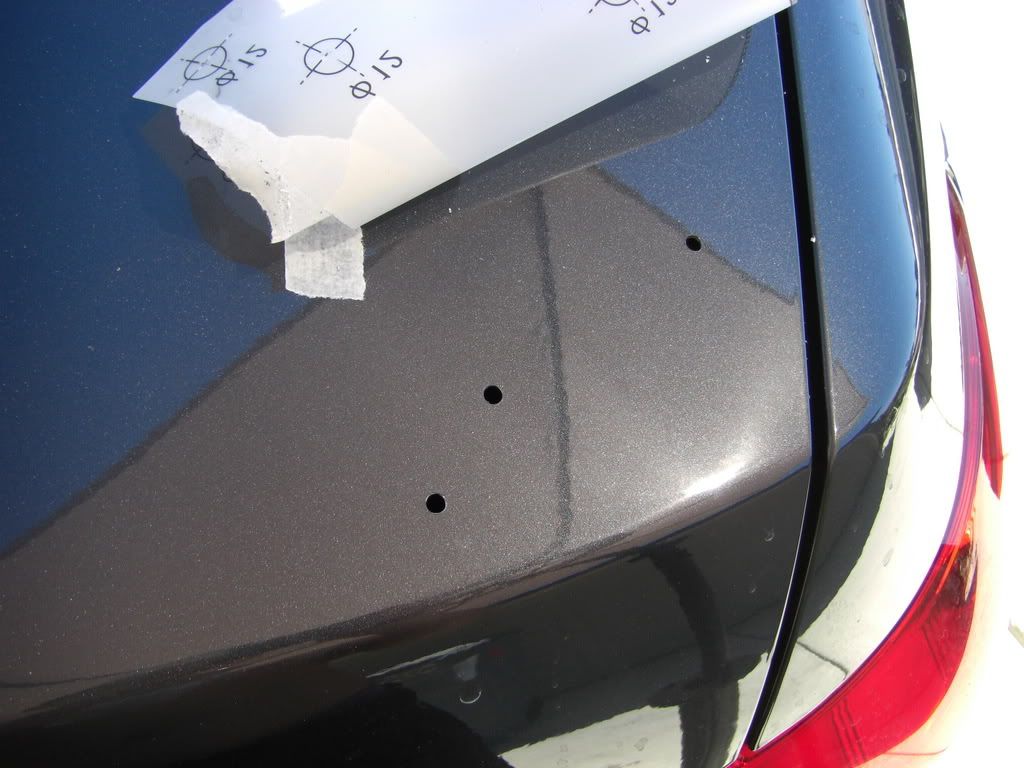
Step fourteen & fifteen:

This will be a lot easier if you have a unibit/step bit (what ever it's called, can one of the mods fix this for me) or a hole saw. You want to enlarge the holes to the proper size. For me, it was 12 mm. I did not have these bits, so we just filed away at the metal with the largest drill bit we had. This took forever (90% of the total time).

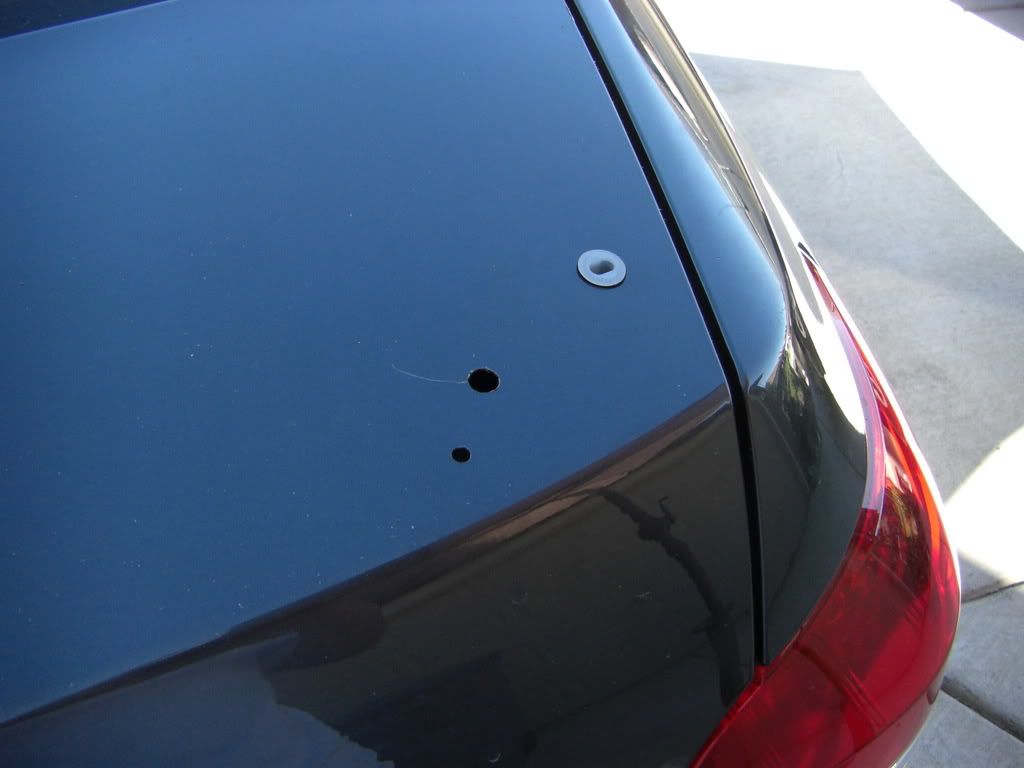
My spoiler uses a nut and a pin-head lock to hold down the spoiler. So after I made the 12mm hole, I plugged the forward most hole with the rubber clip for the pin-head to lock into. My clip had a pill shape lock in it, and required to be in a left to right placement. Like this: <==>


Step sixteen:

Unclip the connector from the existing third brake light. No pictures of this, sorry (really pressured in time by now).


Step seventeen:

Have a friend thread the wire that on the spoiler through the "odd" hole while you are holding the spoiler. Once it's through, remove all the remaining film strips, position the spoiler correctly, and press down until the spoiler sits flush with the trunk. (Sorry, no pics for this step either).


Step eighteen:

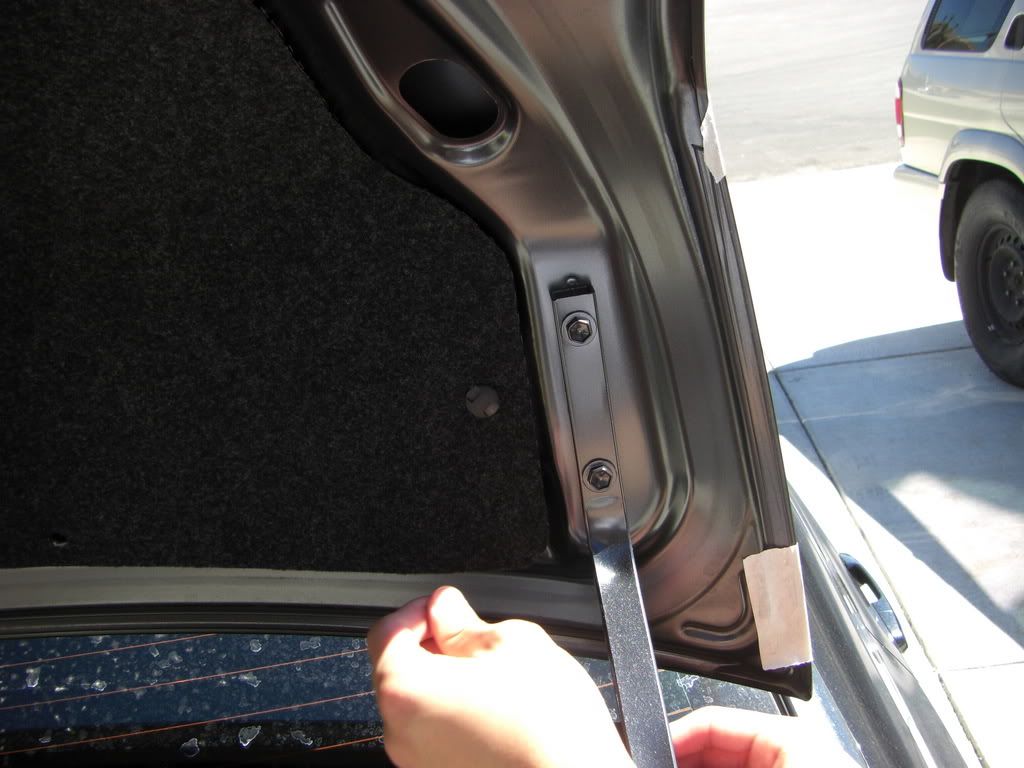
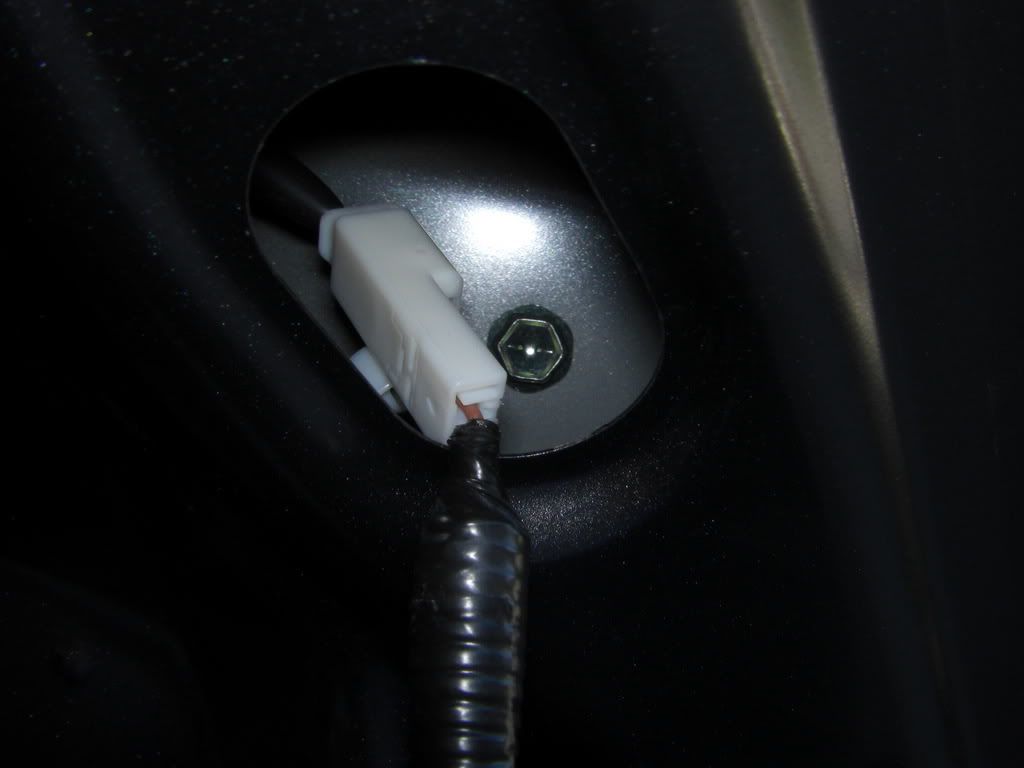
With a socket wrench and an extension, screw down the provided bolts. To prevent losing the bolts, I recommend rolling a small piece of tape inside out and sticking it to the bolt before you put it in the wrench. I only have a picture showing where it is at...


Step nineteen:

Connect the longer wire to the existing third brake light connector and to the short wire that's from the spoiler.


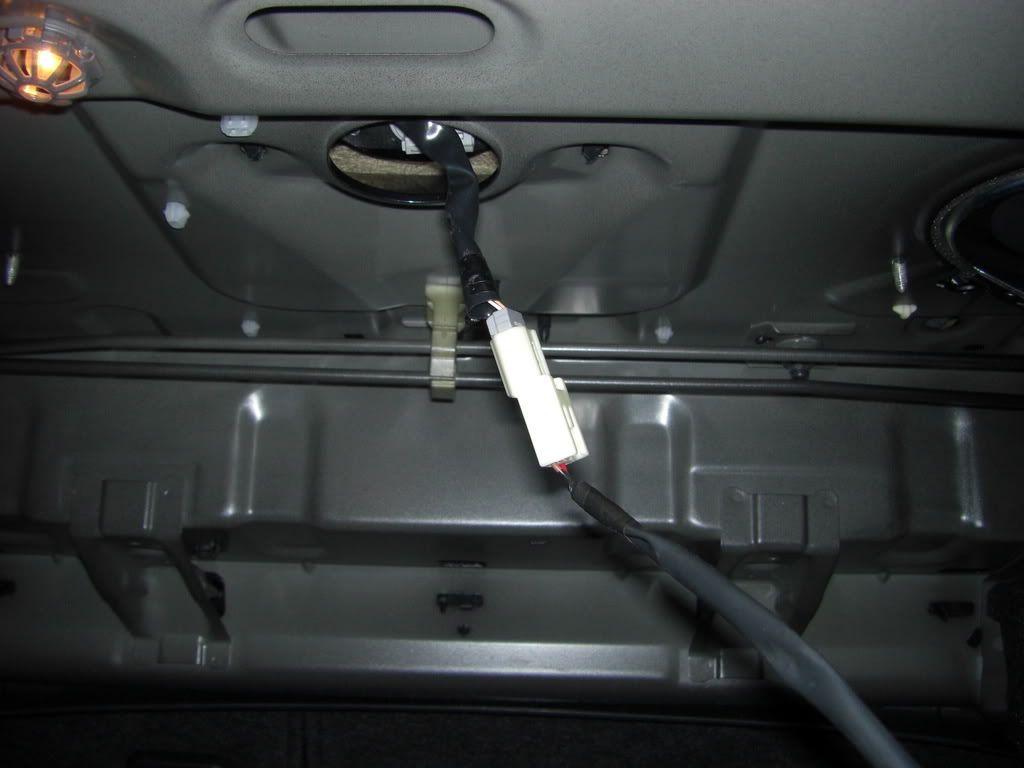
With the provided zip-ties, tie down the wire so it does not dangle (didn't have the time to do this, so mine is still hanging).


Step twenty:

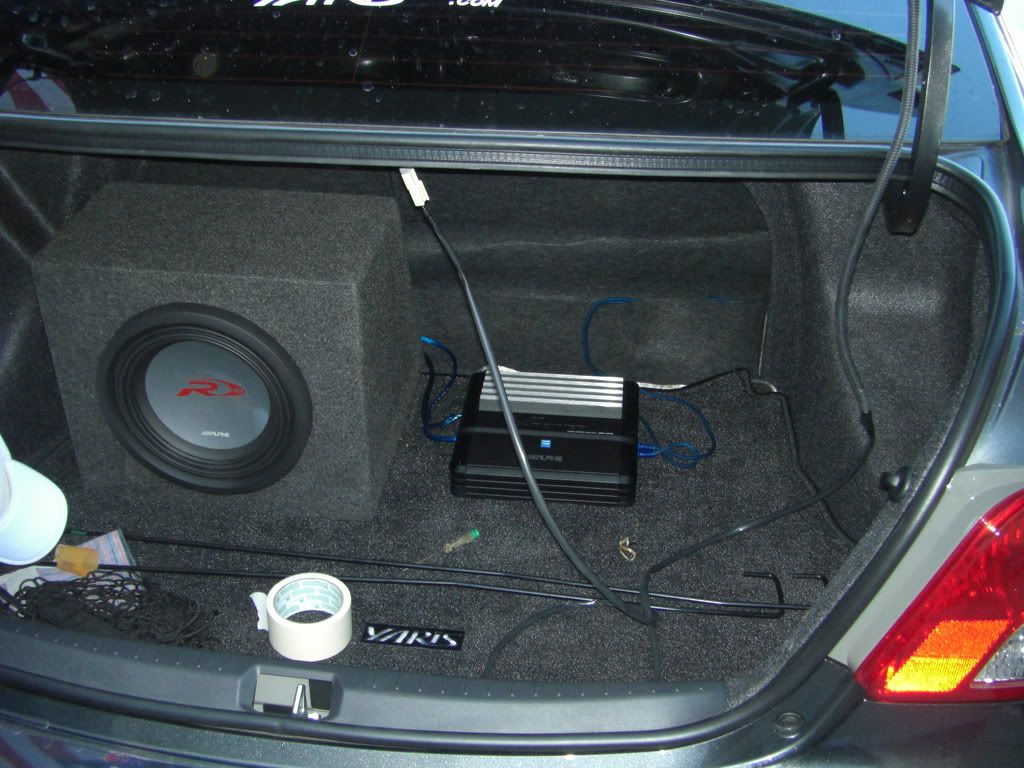
I did not get the chance to do this, but you should replace the tension rods with the ones provided. I'm not sure if you have to, but it makes opening and closing the trunk easier since the provided ones are stiffer/stronger than the existing ones.


They're the horizontal rods in the background. I was about to replace them, but I absolutely had no more time.


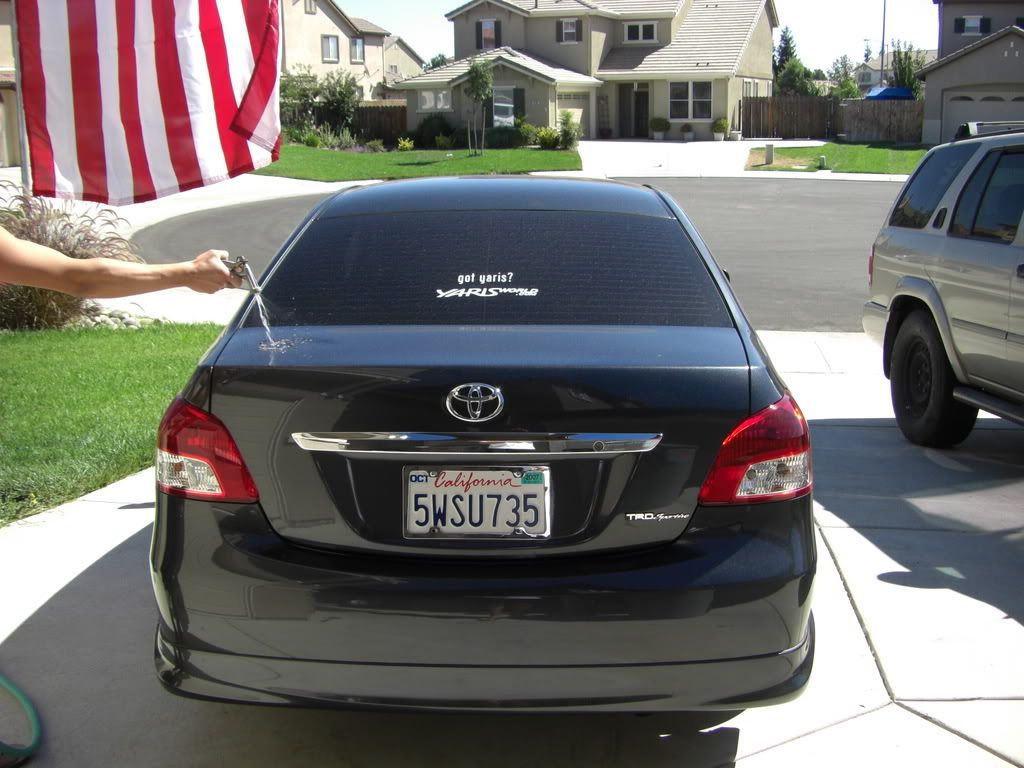
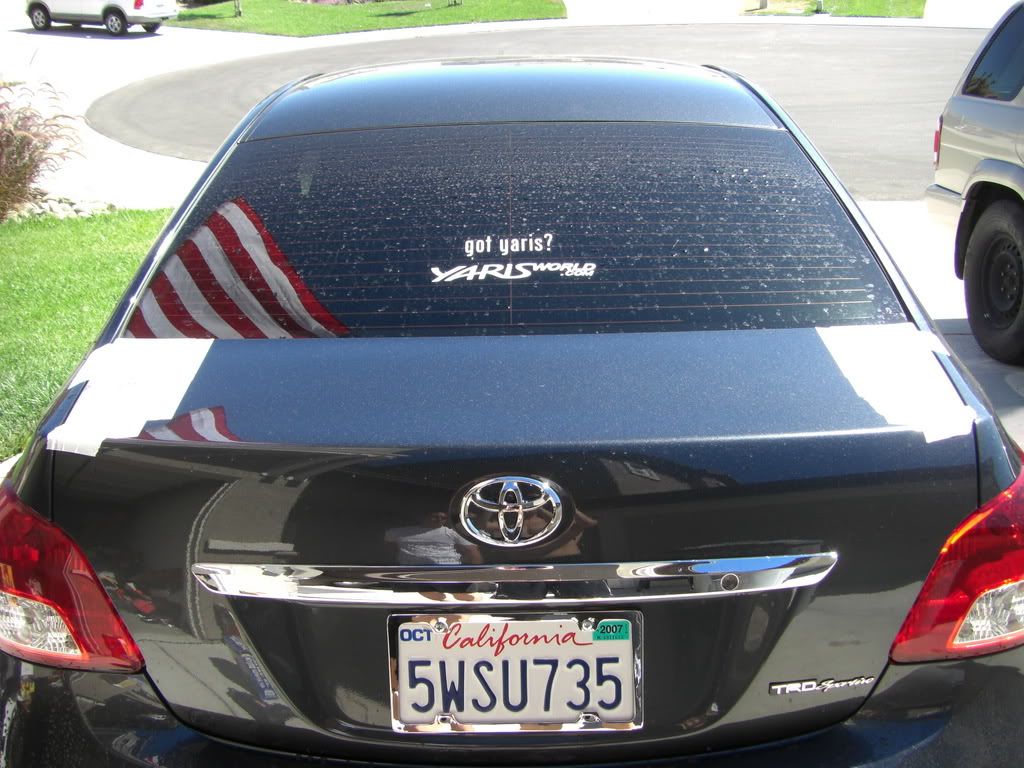
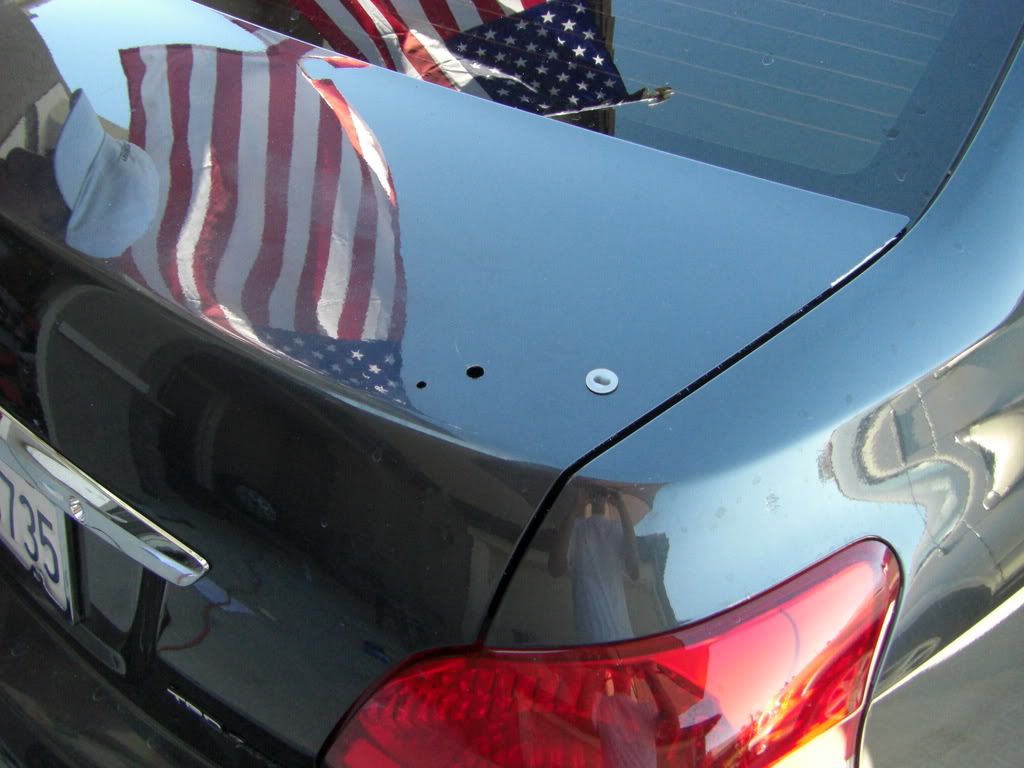
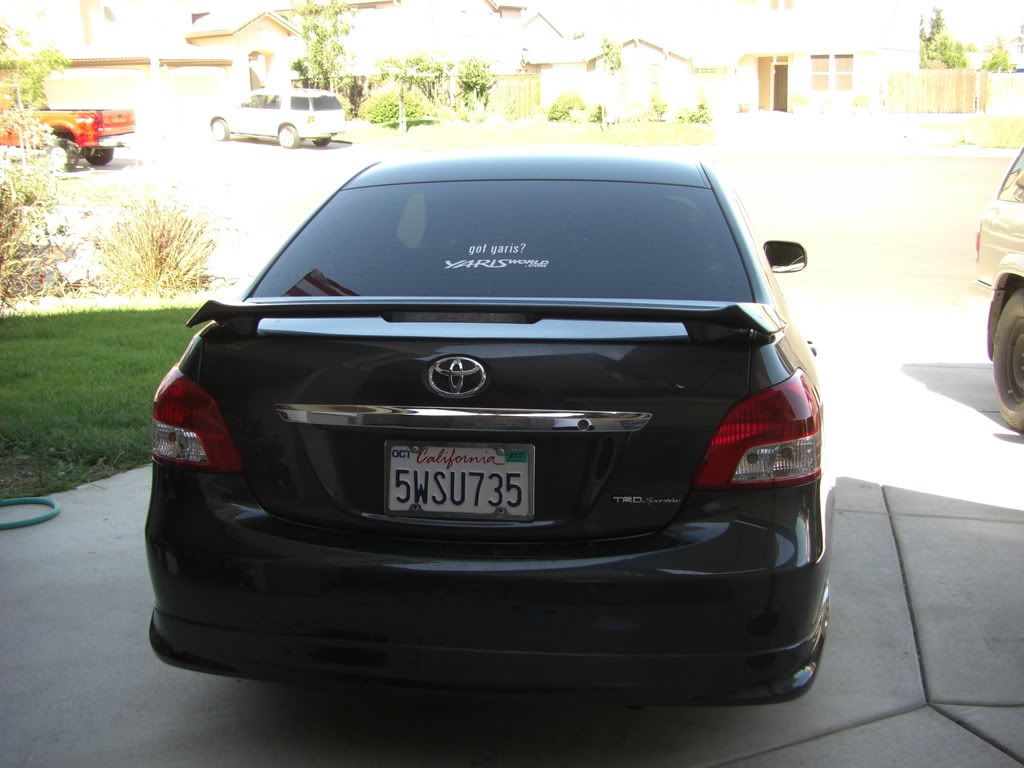
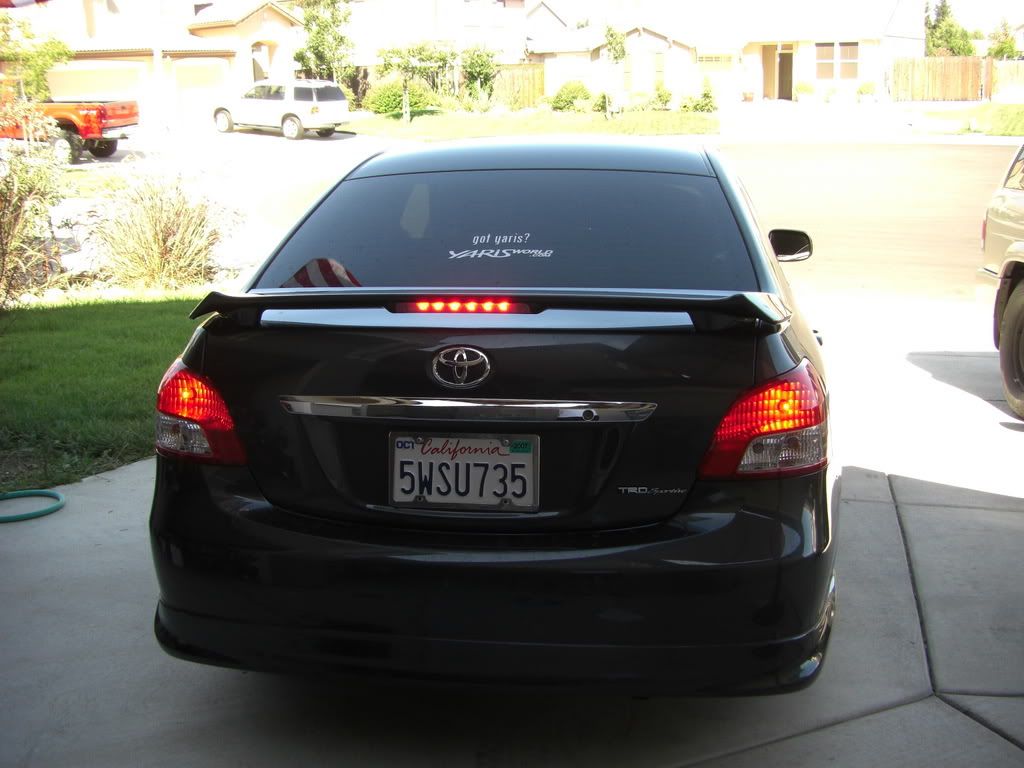
And the finished product:


Just in case you get a replica, it may not come with the templates. I do not have mine anymore, but I have pics to provide a ball park estimate of how far the spoiler legs are from the edges of the trunk. I can provide them if anyone needs them.